Send personalized emails to your Lens followers using Mailchain SDK

Web3 Developer
Introduction
Modules are a powerful feature of the Lens Protocol that enables profile owners to add dynamic custom functionality to follow, collect, and reference interactions. These modules allow developers to create exciting, community-driven features that greatly enhance the basic Lens Protocol social graph. For example, a Follow module could be used to charge a fee for access to exclusive content or services.
In this tutorial, we will showcase the Follow module integrated with Mailchain, a secure messaging protocol that ensures end-to-end encryption for all messages sent and received on the blockchain.
With regards to the integration, we will be sending a welcome email to new users who follow a profile. The email will inform them about the benefits they will receive by following that particular profile. This is aimed at making a web3 social media platform more engaging.
Setup
For this tutorial, we will be using the following stack and dependencies:
Next.js
Tailwind CSS
Ethers.js
LensClient SDK
Mailchain SDK
To get started, we'll need to have a Lens profile. Since this tutorial is focused on the Mailchain integration, you could either use your Lens handle profileId in case you own it or create a profile using the Lens API playground following the Create Profile Docs. However, you will be able to use the same profileId: "0x72b1" that is already on the implemented code.
Let's begin and create our Next.js app.
npx create-next-app mailchain-lens-followers-tutorial
To style our project, we'll be using Tailwind CSS. The official documentation provides a quick guide for setting it up in a Next.js project. I highly recommend bookmarking this link for future projects.
https://tailwindcss.com/docs/guides/nextjs
Then, we need to install the rest of the dependencies for our project.
npm install ethers @lens-protocol/client @mailchain/sdk
To complete the setup process, let's create our Mailchain accounts (sender and receiver) at https://app.mailchain.com/register.
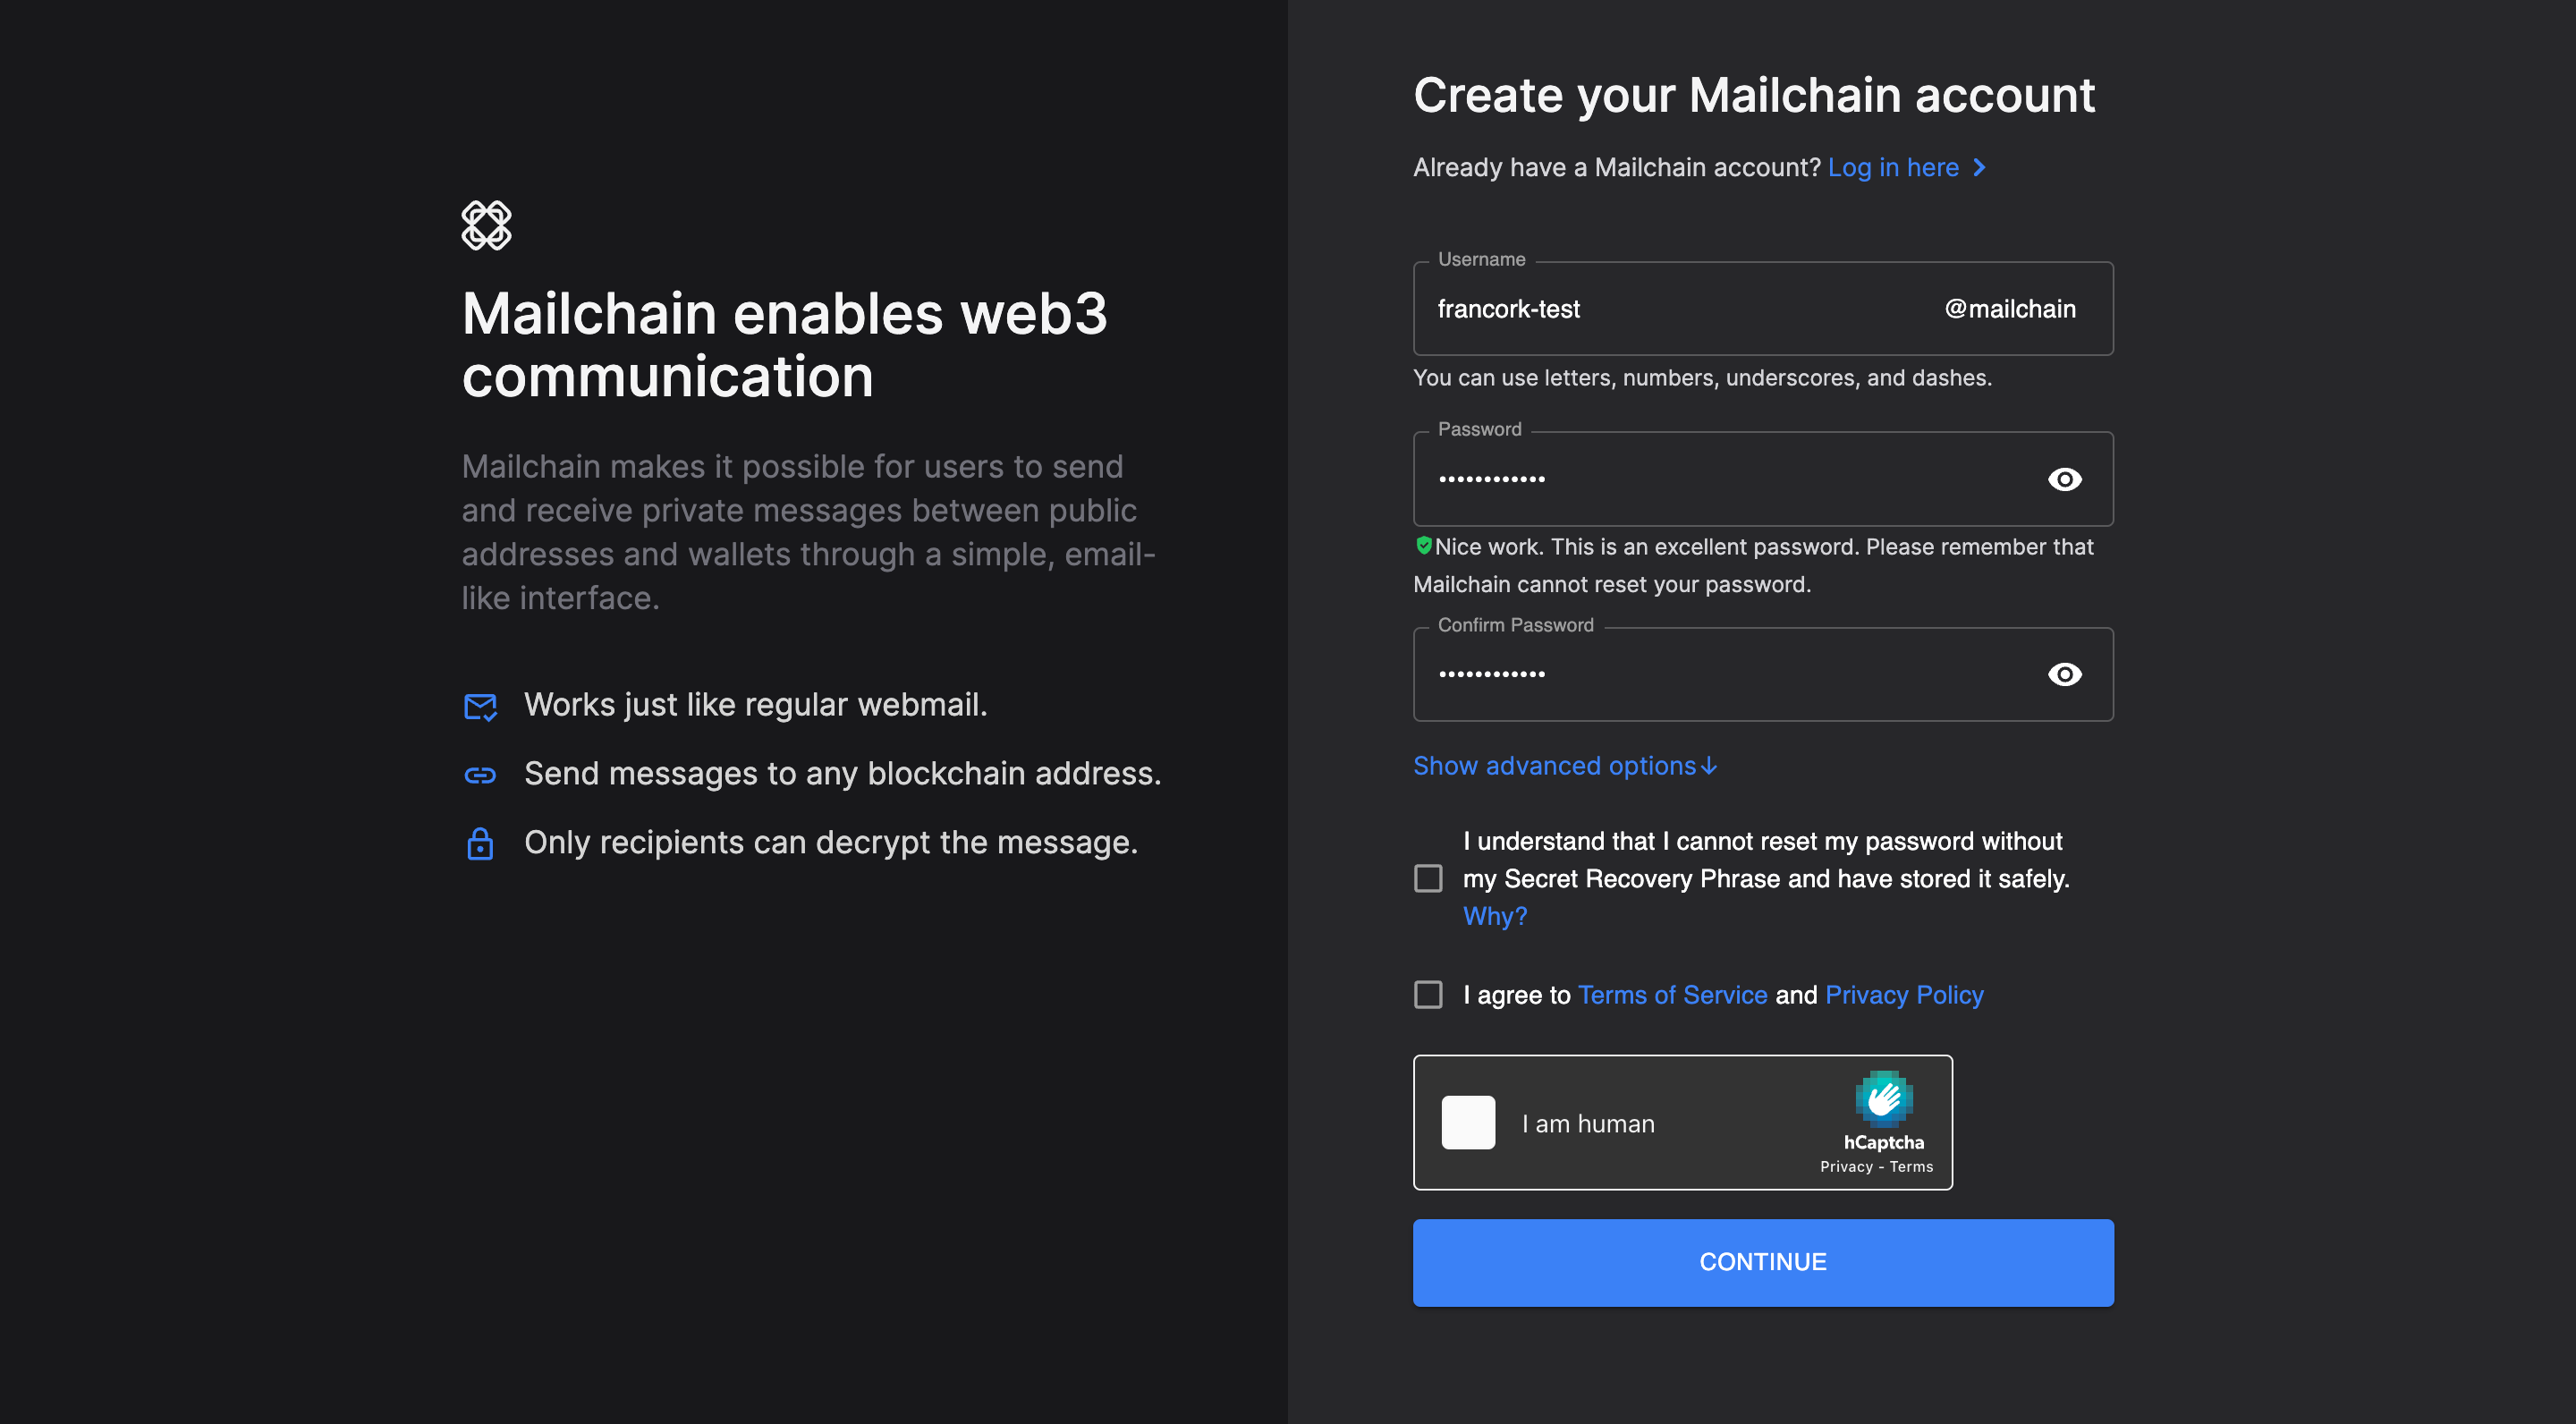
All we have to do is provide a username and password and agree to the terms. Don't forget to save your secret recovery phrase, which is available in the advanced options, in a secure location. We'll need it for our implementation at a later time.
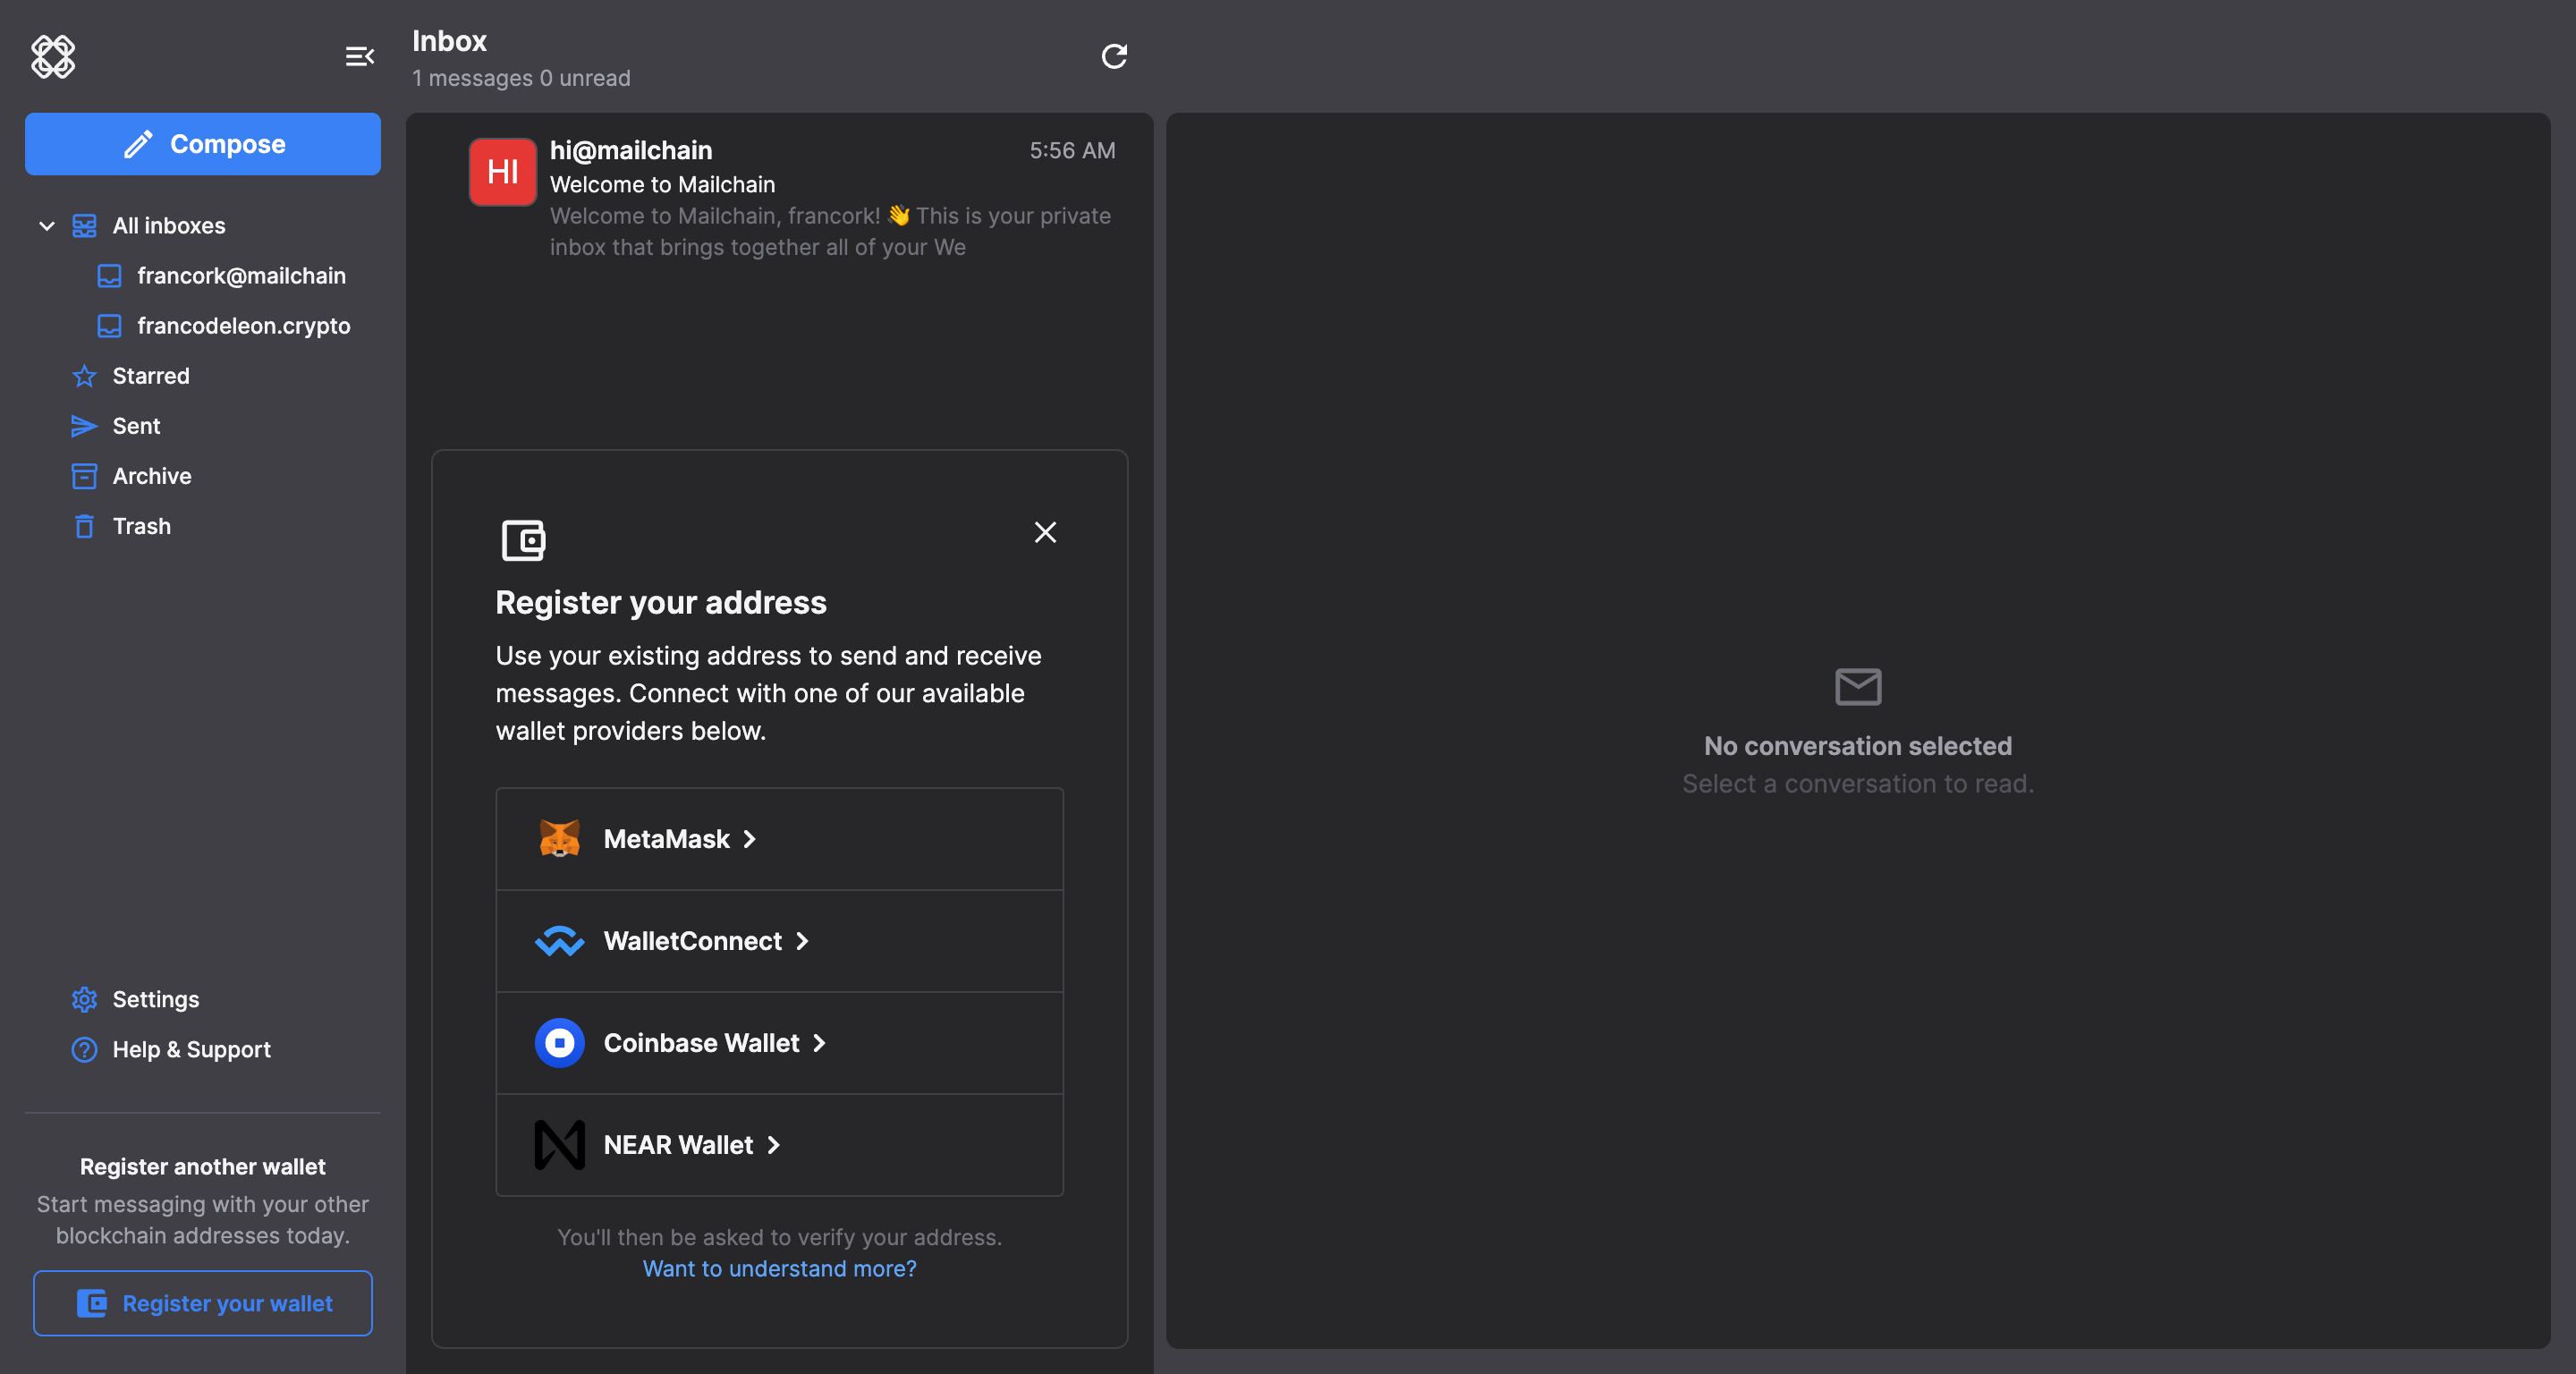
Once the account is created we need to connect our wallet for registering the address in which we want to receive mail.
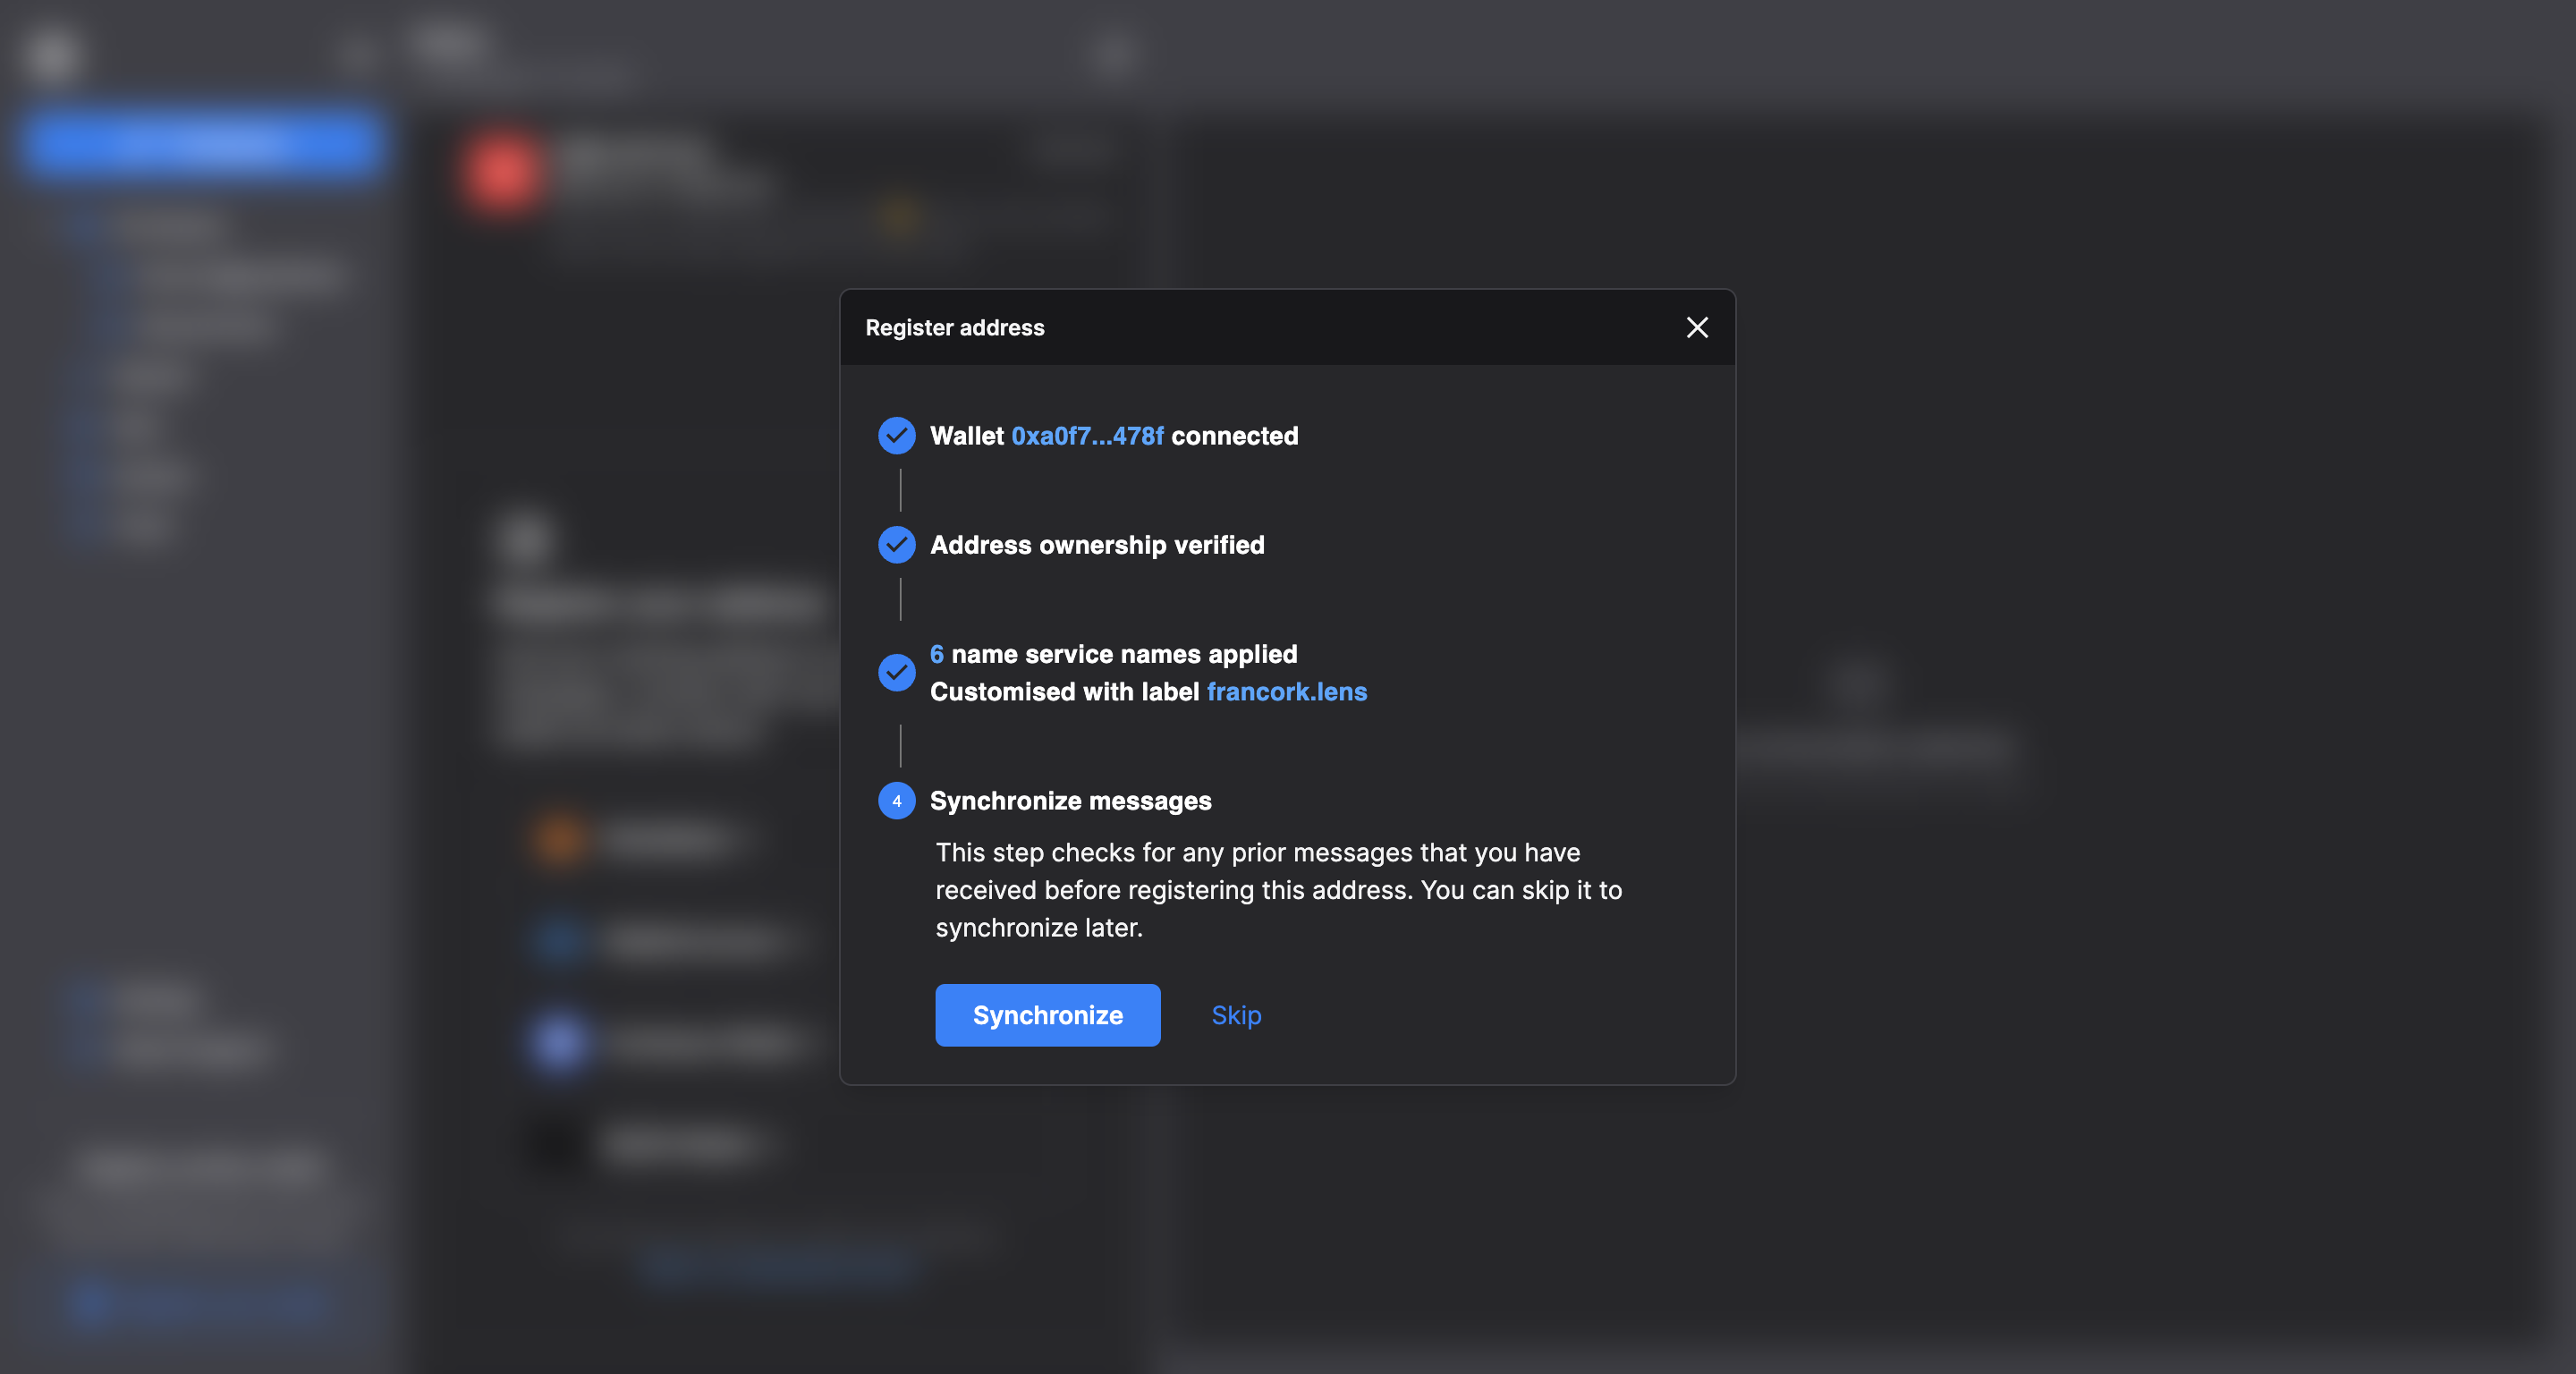
For this instance, I linked my wallet and personalized it by using the label francork.lens, which is my Lens handle. If you don't have a Lens handle, don't worry as it's not mandatory for receiving emails, your wallet address should be enough.
Let's code
We can start by creating a UI component for following our profile. I declared it locally at pages/index.js with the name ProfileCard.
function ProfileCard() {
  const [isFollowing, setIsFollowing] = useState(false);

  return (
    <div className="border border-gray-400 rounded-lg p-8 w-3/4 md:w-1/3 mx-auto">
      <div className="flex flex-col justify-center">
        <img
          className="border-2 border-gray-400 mx-auto w-16 h-16 rounded-full"
          src="https://docs.mailchain.com/img/logo.svg"
        />
        <h4 className="text-lg text-center my-2 font-semibold">
          francork.test
        </h4>
        <p className="text-center mb-2">Web3 Developer</p>
        <button
          className="rounded-full bg-[#abff2d] text-[#00501e] px-8 py-4 disabled:bg-gray-200"
          onClick={follow}
          disabled={isFollowing}
        >
          {isFollowing ? "Following" : "Follow"}
        </button>
      </div>
    </div>
  );
}
As you can see the most important part of this component is the button with the label 'Follow' or 'Following' depending on the flag isFollowing. Let's define the follow function which is also part of this button and that is called when clicking it.
import { createFollow } from "../services/lens";

async function follow() {
  // following the profile
  setIsFollowing(true);
  const { address } = await createFollow();

  // calling api for sending email
  sendEmail(address);
}

async function sendEmail(address) {
  fetch("/api/welcome", {
    method: "POST",
    body: JSON.stringify({ address }),
    headers: {
      "Content-Type": "application/json",
    },
  });
}
It is an easy to understand 3 lines function, first we will change the isFollowing flag with the assumption that everything will proceed as expected, then we call the function createFollow which come from a created lens service(attached above) and finally sends the email with a fetch api call.
../services/lens.js code:
import { ethers } from "ethers";
import { LensClient, development } from "@lens-protocol/client";

// init the lens client
const lensClient = new LensClient({
  environment: development,
});

// connect wallet and authenticate on lensClient
async function authenticate() {
  if (typeof window.ethereum !== "undefined") {
    const provider = new ethers.providers.Web3Provider(window.ethereum);
    await provider.send("eth_requestAccounts", []);
    const signer = provider.getSigner();
    const address = await signer.getAddress();

    const challenge = await lensClient.authentication.generateChallenge(
      address
    );

    const signature = await signer.signMessage(challenge);

    await lensClient.authentication.authenticate(address, signature);

    const isAuth = await lensClient.authentication.isAuthenticated();

    return { signer, isAuth };
  }
}

// create the follow typed data and sends the transaction
export async function createFollow() {
  const { signer } = await authenticate();
  const address = await signer.getAddress();

  const followTypedDataResult = await lensClient.profile.createFollowTypedData({
    follow: [
      {
        profile: "0x72b1", // our profileId
      },
    ],
  });

  const data = followTypedDataResult.unwrap();

  const signedTypedData = await signer._signTypedData(
    data.typedData.domain,
    data.typedData.types,
    data.typedData.value
  );

  const broadcastResult = await lensClient.transaction.broadcast({
    id: data.id,
    signature: signedTypedData,
  });

  return { address, broadcastResult };
}
For the API /api/welcome endpoint, we need to have the following file pages/api/welcome.js and it includes the following code for sending the email using the Mailchain SDK. Also don't forget to add the .env file which will contain your SECRET_RECOVERY_PHRASE
# .env file
SECRET_RECOVERY_PHRASE='word word word ...'
// Next.js API route support: https://nextjs.org/docs/api-routes/introduction
import { Mailchain } from "@mailchain/sdk";

export default function handler(req, res) {
  const { method } = req;
  const { address } = req.body;

  if (method === "POST") {
    sendWelcomeEmail(address);
  }
}

async function sendWelcomeEmail(address) {
  const secretRecoveryPhrase = process.env.SECRET_RECOVERY_PHRASE;
  const mailchain = Mailchain.fromSecretRecoveryPhrase(secretRecoveryPhrase);
  const { address: senderAddress } = await mailchain.user();
  const { data, error } = await mailchain.sendMail({
    from: senderAddress,
    to: [`${address}@ethereum.mailchain.com`],
    subject: "Welcome to my profile",
    content: {
      text: "Thanks for following my profile",
      html: `
        <h1>Web3SocialMedia</h1>
        <div>
          <p>Thanks for following my profile, you can now access to exclusive content. This includes:</p>
          <ul>
            <li>Advanced web3 courses and tutorials</li>
            <li>One to one mentoring once a week</li>
            <li>Collaboration opportunities</li>
          </ul>
          <p>I will also keep you updated about new stuff via mailchain.</p>
          <p>See you soon!</p>
        </div>
      `,
    },
  });

  console.log(data, error);
}
All we need to do is, first, get our SECRET_RECOVERY_PHRASE to init a mailchain instance, the sender address could be gotten from calling mailchain.user and finally we send the email using functionmailchain.sendEmail with the options:
from: the sender address.
to: an array of receiver addresses.
subject: the email subject.
content: the message body, both in text and HTML.
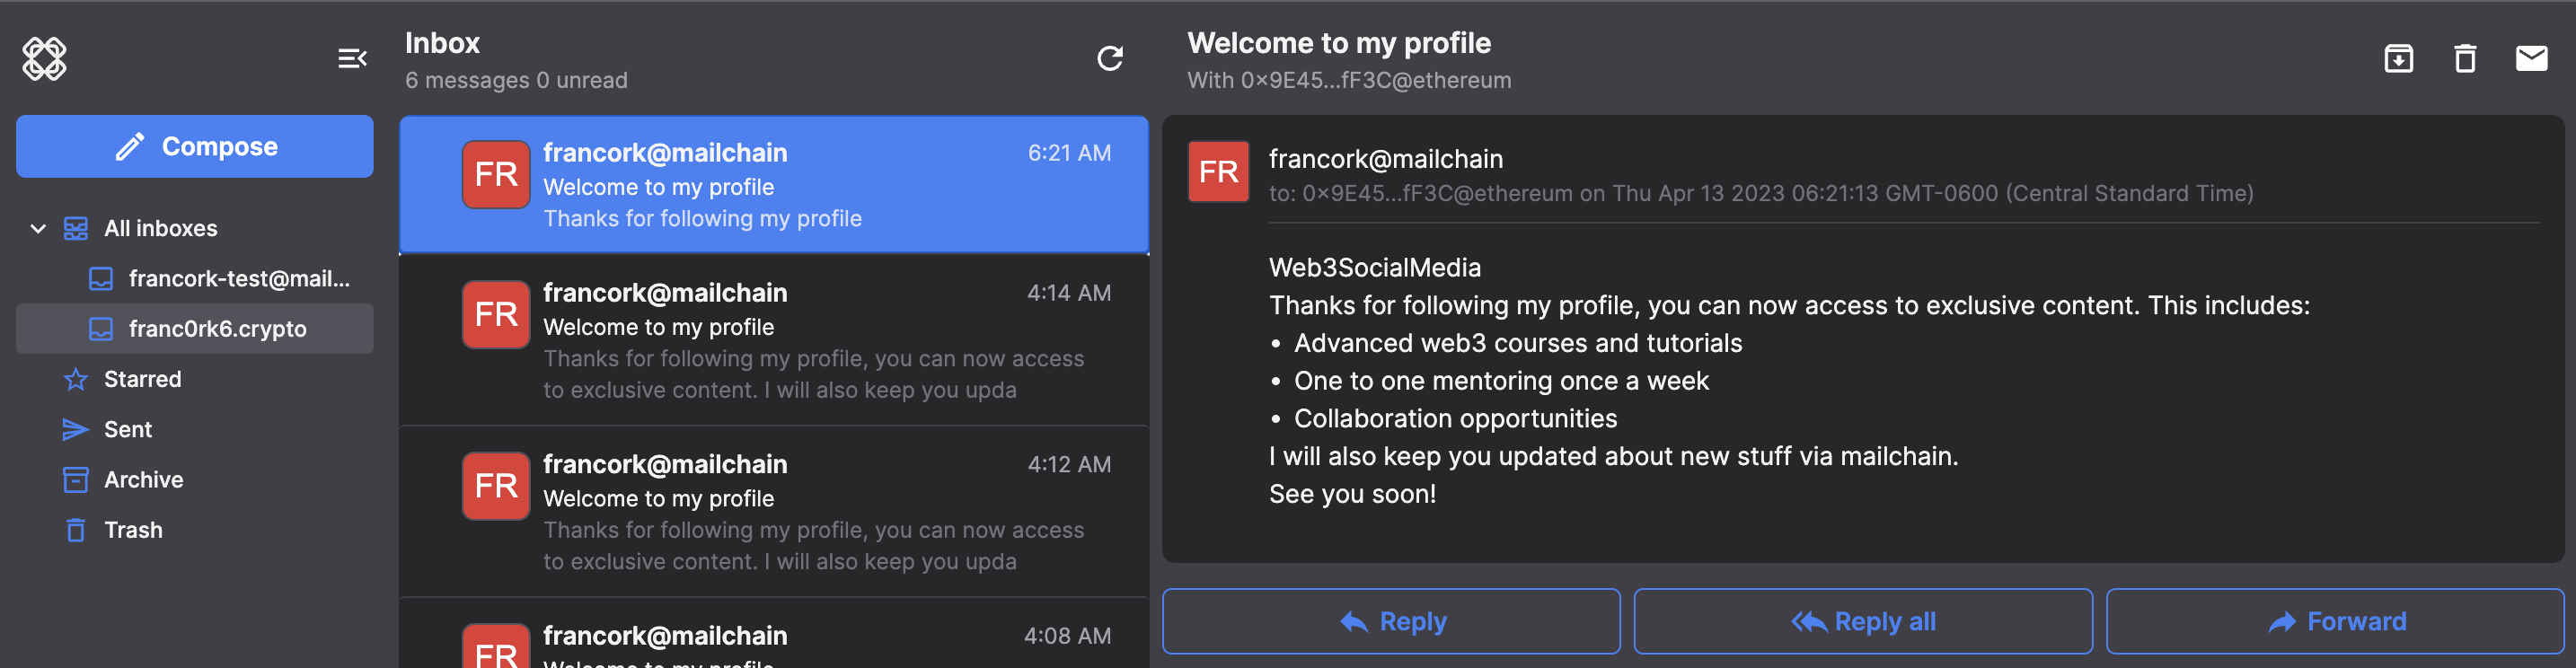
And that would be it! Now we can test clicking the follow button, and signing the transaction. Then we will be able to see a new email in the Mailchain app.

Github repo: https://github.com/franc0rk/mailchain-lens-followers
Conclusion
Working with web3 tools has been an exciting journey for me as a developer. Among the many tools I have used, Mailchain and Lens Protocol stand out as a powerful combination that can enhance the privacy and security of users' communications and data, while also providing a seamless and engaging user experience.
Social Media
If you enjoyed this tutorial and want to stay updated on my latest projects and more web3 content, be sure to follow me.
Twitter: @franc0rk
Lens: francork.lens